Running an EMaC Policy Import End to End
Overview
This guide explains how to complete an EMaC policy import from start to finish, from uploading the source files to verifying the imported data in ViSN.
Before You Start
- Ensure both source files are available:
emacFleetFile.csvemacBenefitsFile.csv
- Ensure the import schedulers have already been created.
- For scheduler setup steps, see Creating EMaC Policy Import Schedulers.
Step 1: Upload the Files
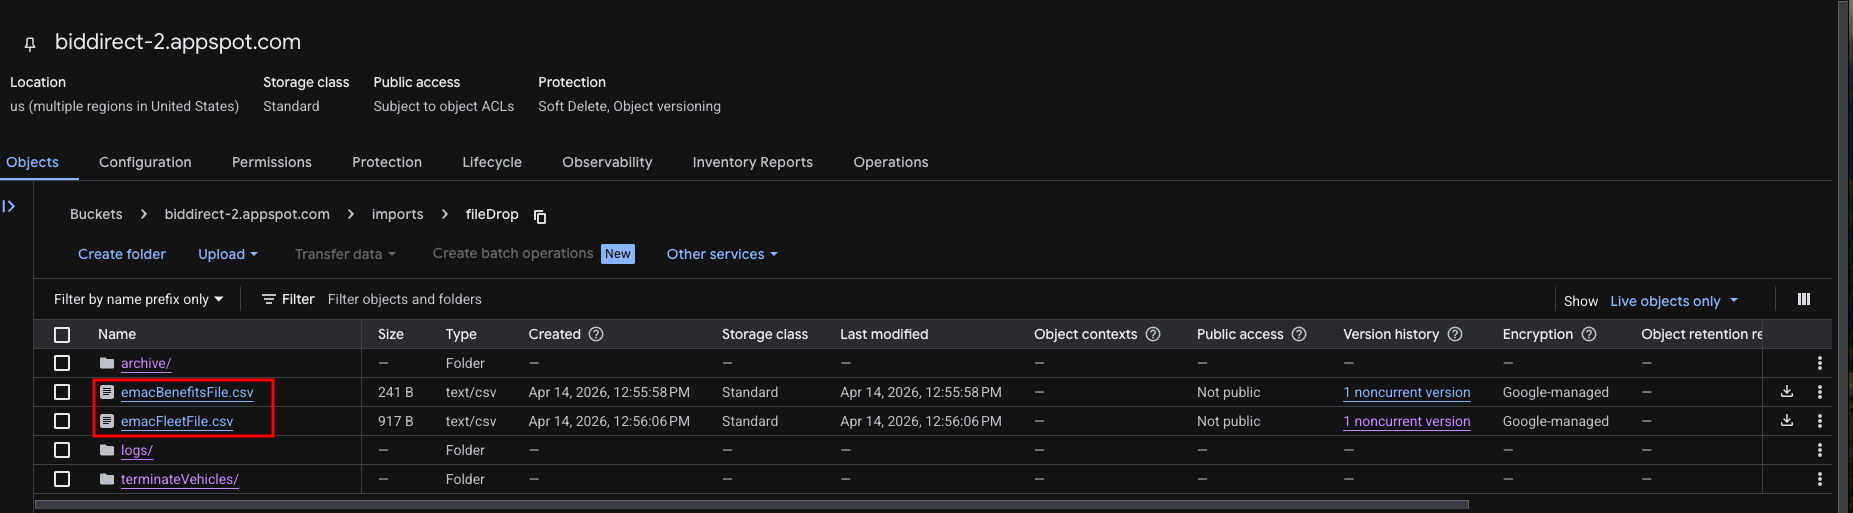
- Open the correct storage bucket for the target environment.
- Navigate to
imports/fileDrop/. - Upload
emacFleetFile.csv. - Upload
emacBenefitsFile.csv. - Confirm that both files are present before continuing.
Step 2: Run the Fleet File Import
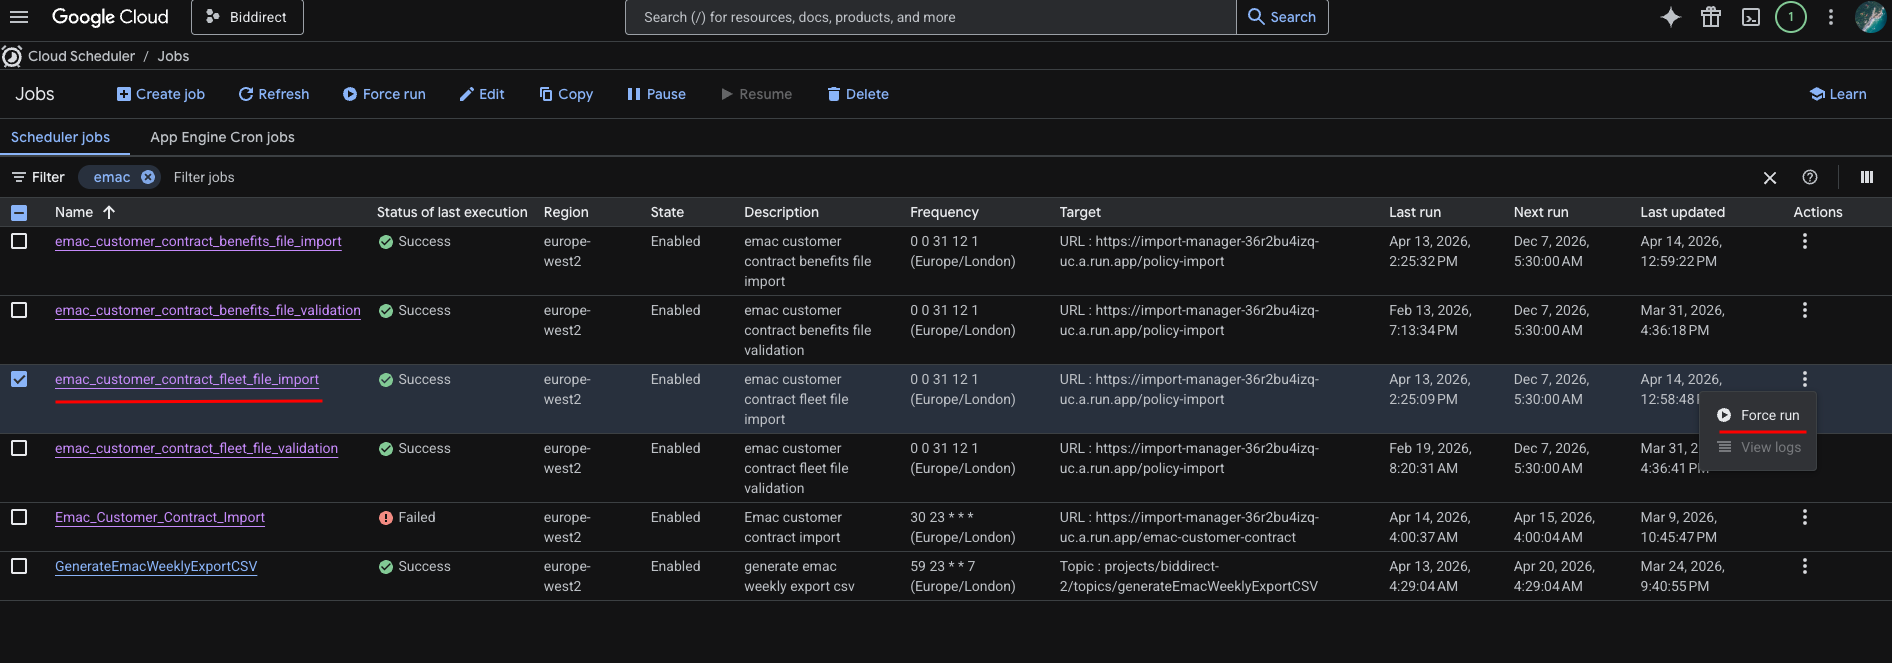
- Open Cloud Scheduler.
- Find the
emac_customer_contract_fleet_file_importjob. - Run the scheduler.
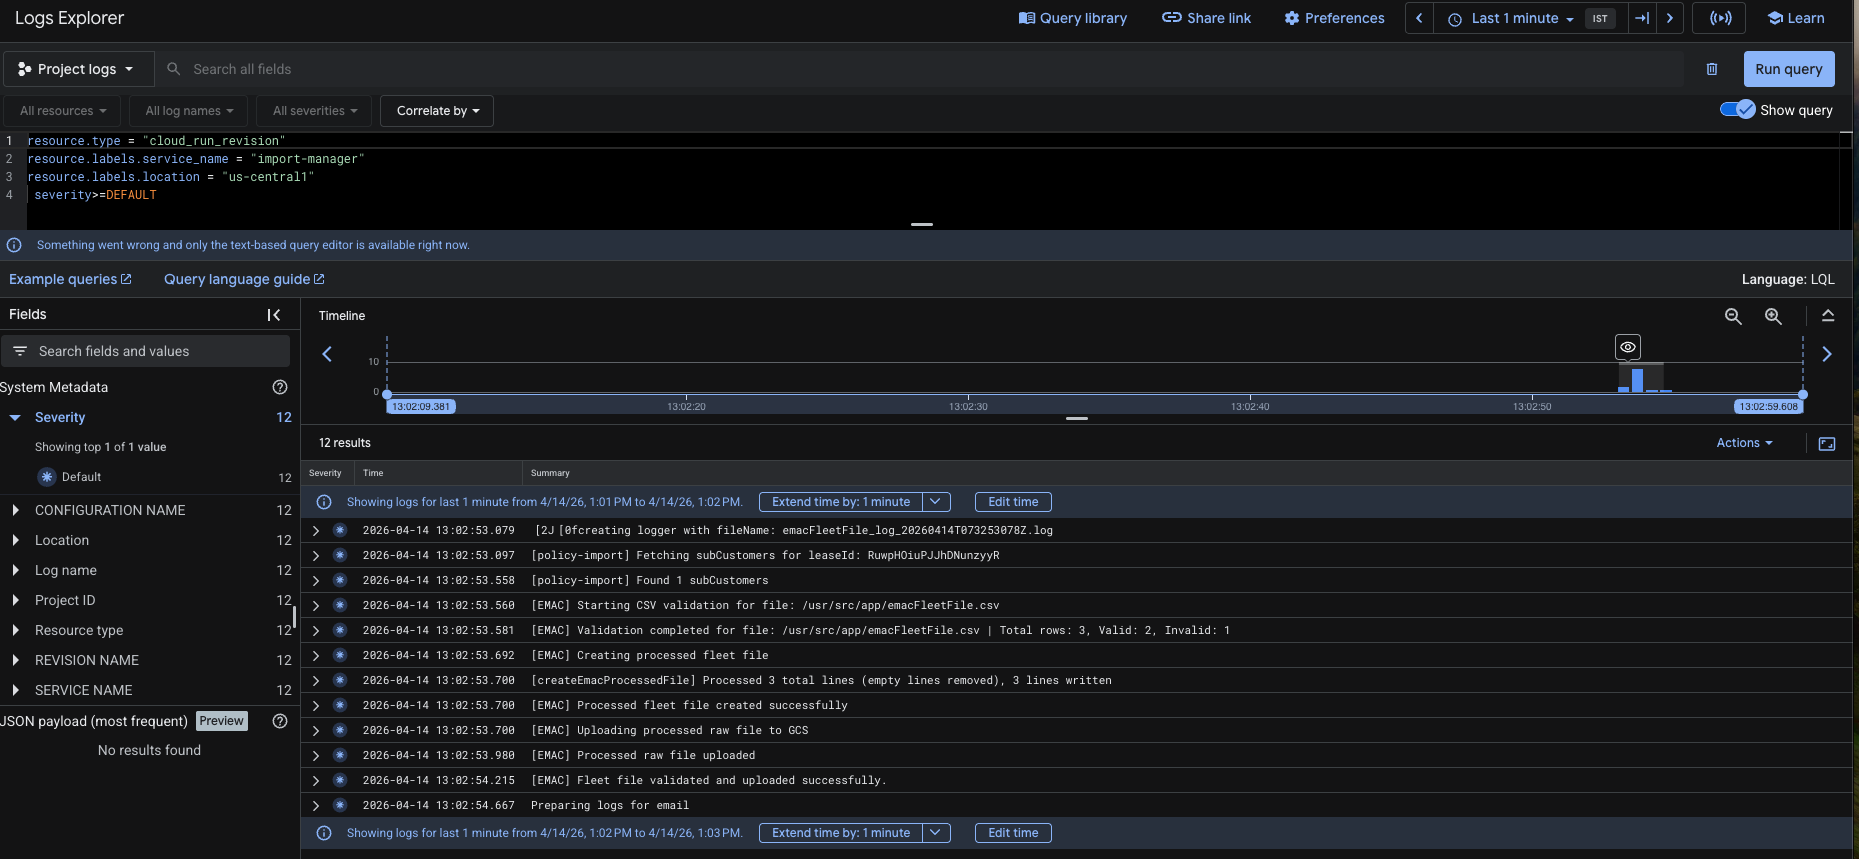
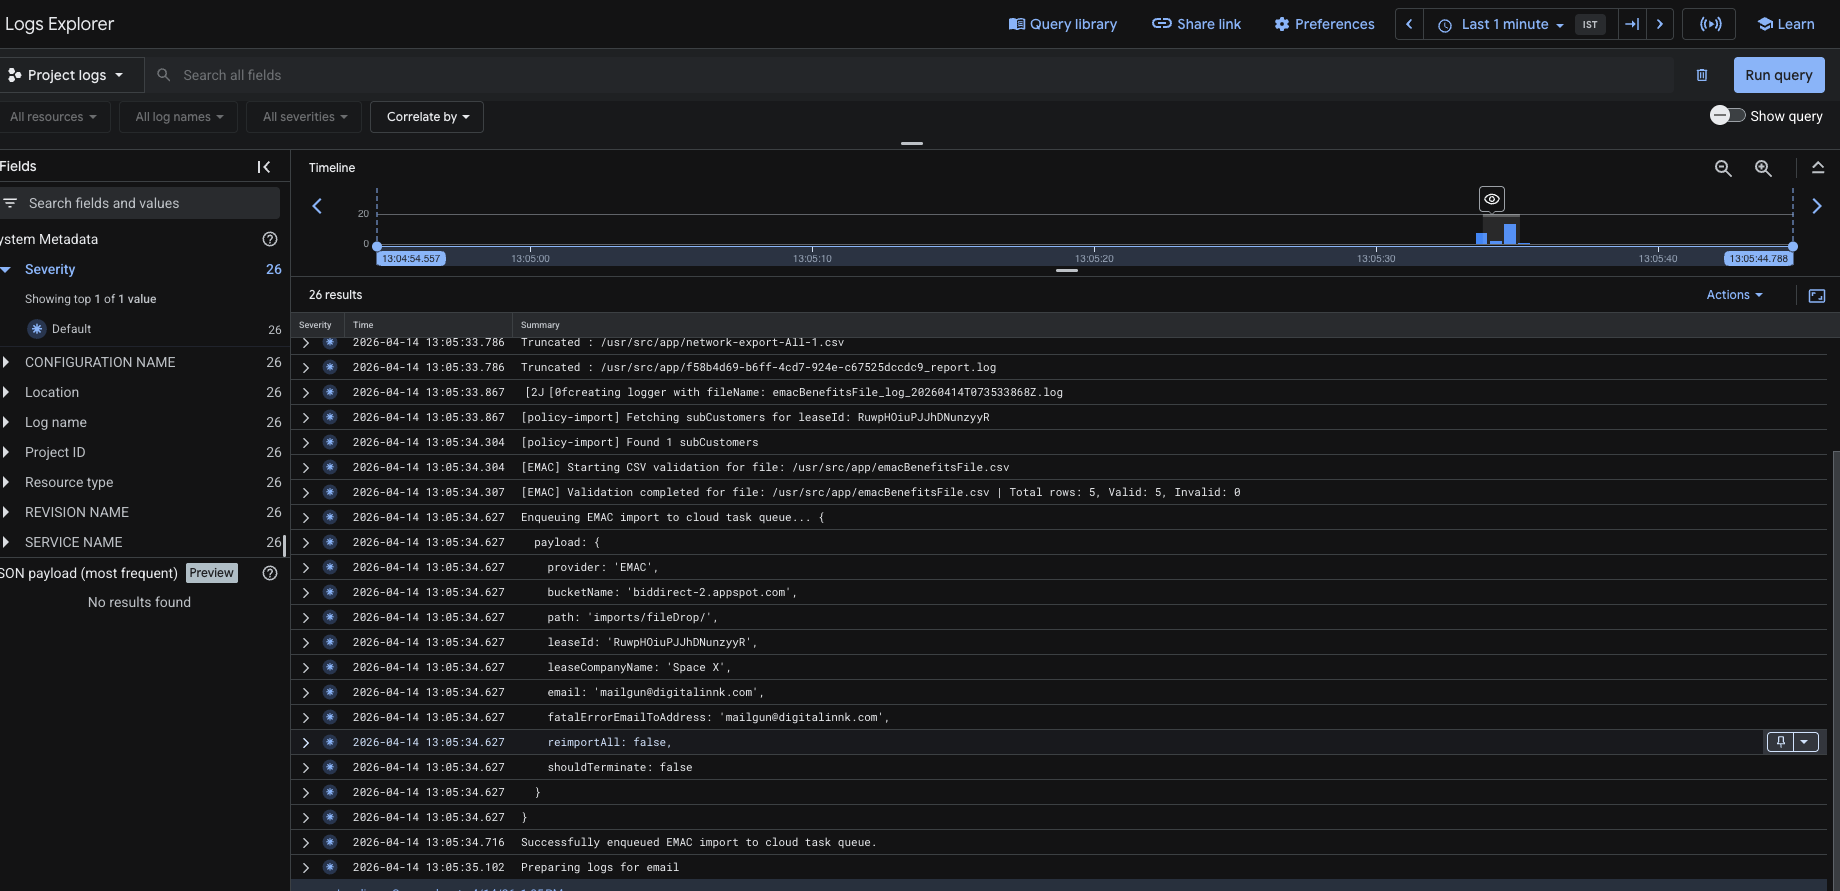
- Wait for the job to finish.
- Confirm that the job completed successfully before continuing.
Step 3: Run the Benefits File Import
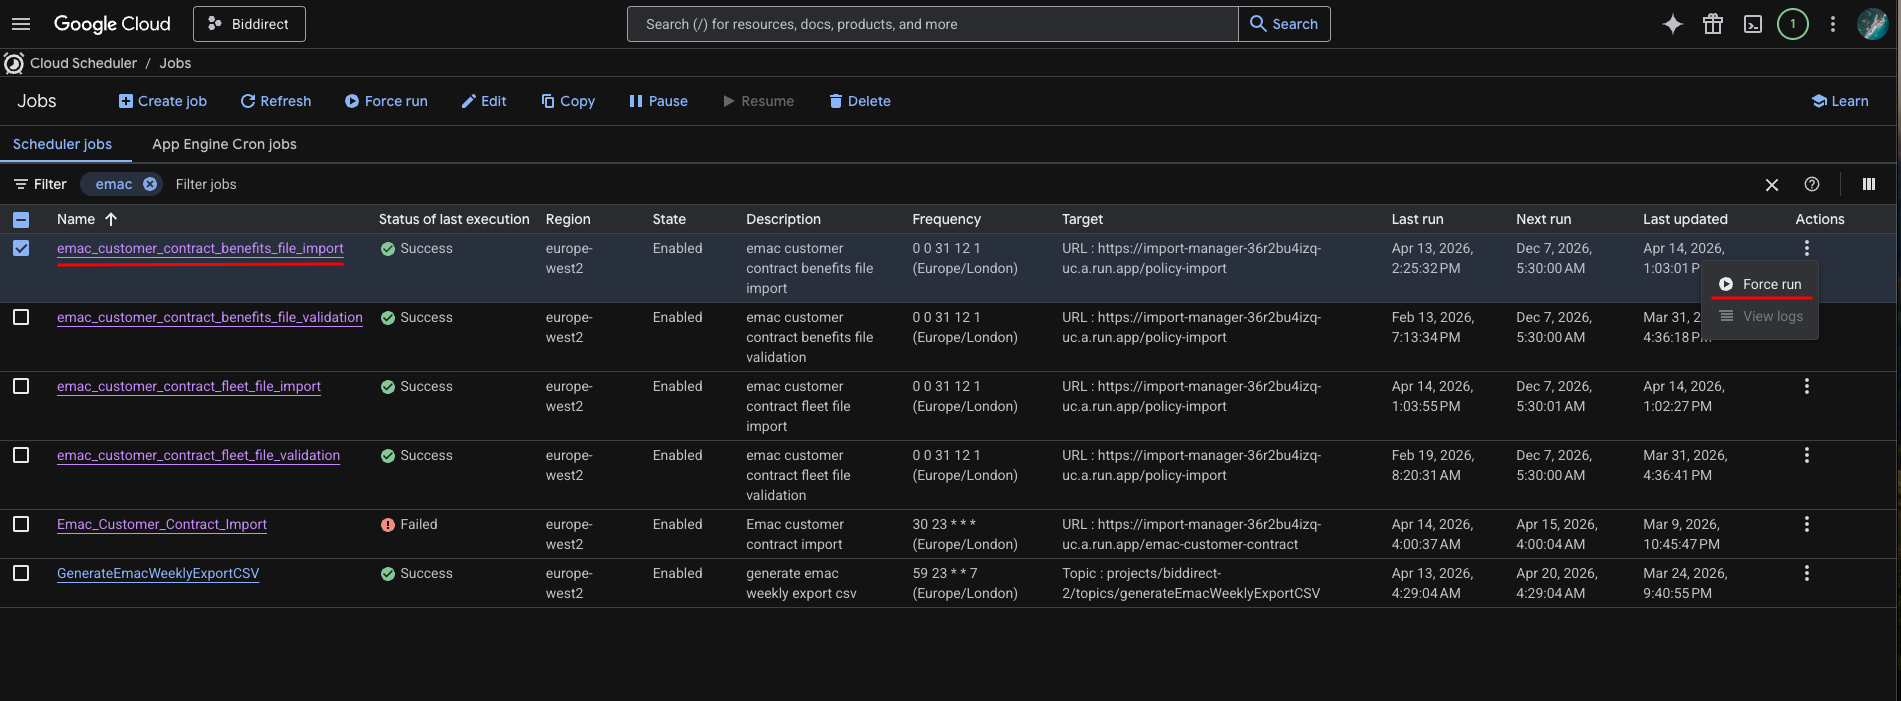
- In Cloud Scheduler, find the
emac_customer_contract_benefits_file_importjob. - Run the scheduler.
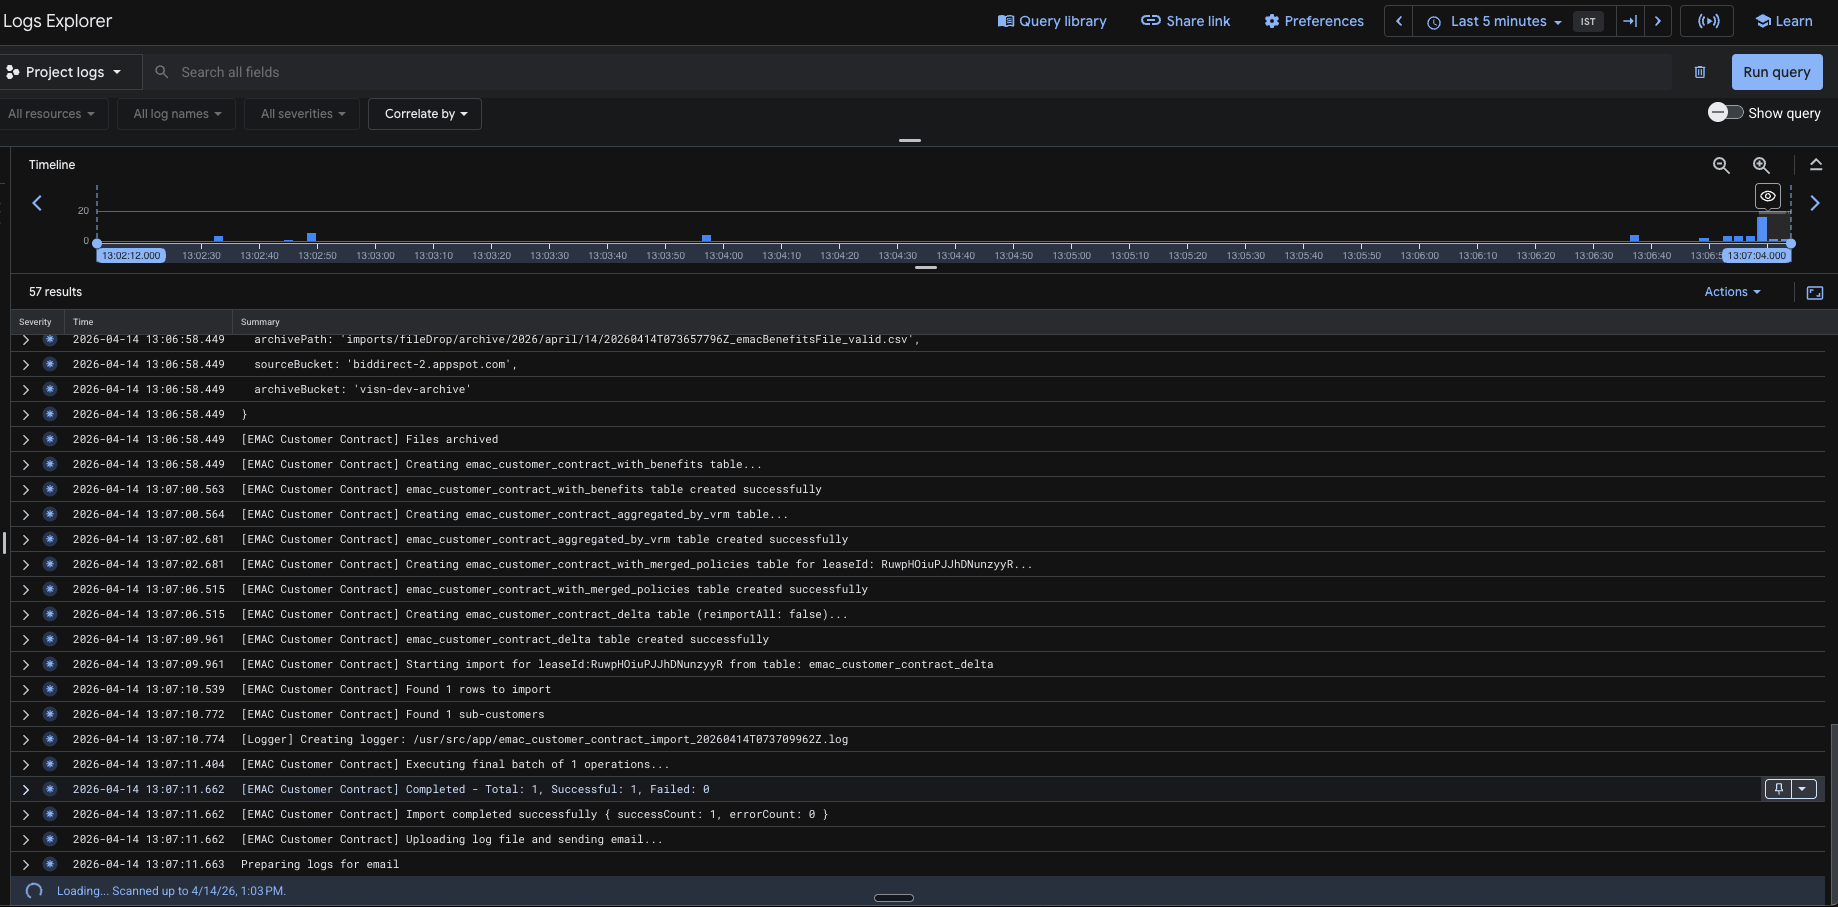
- Wait for the job to finish.
- Confirm that the job completed successfully.
- This step completes the EMaC policy import.
Step 4: Log in to ViSN
- Log in to ViSN as the customer.
- Open the correct customer account or lease context.
Step 5: Open the Policies Page
- Navigate to the Policies page in ViSN.
- Open the policy list for the relevant lease or customer.
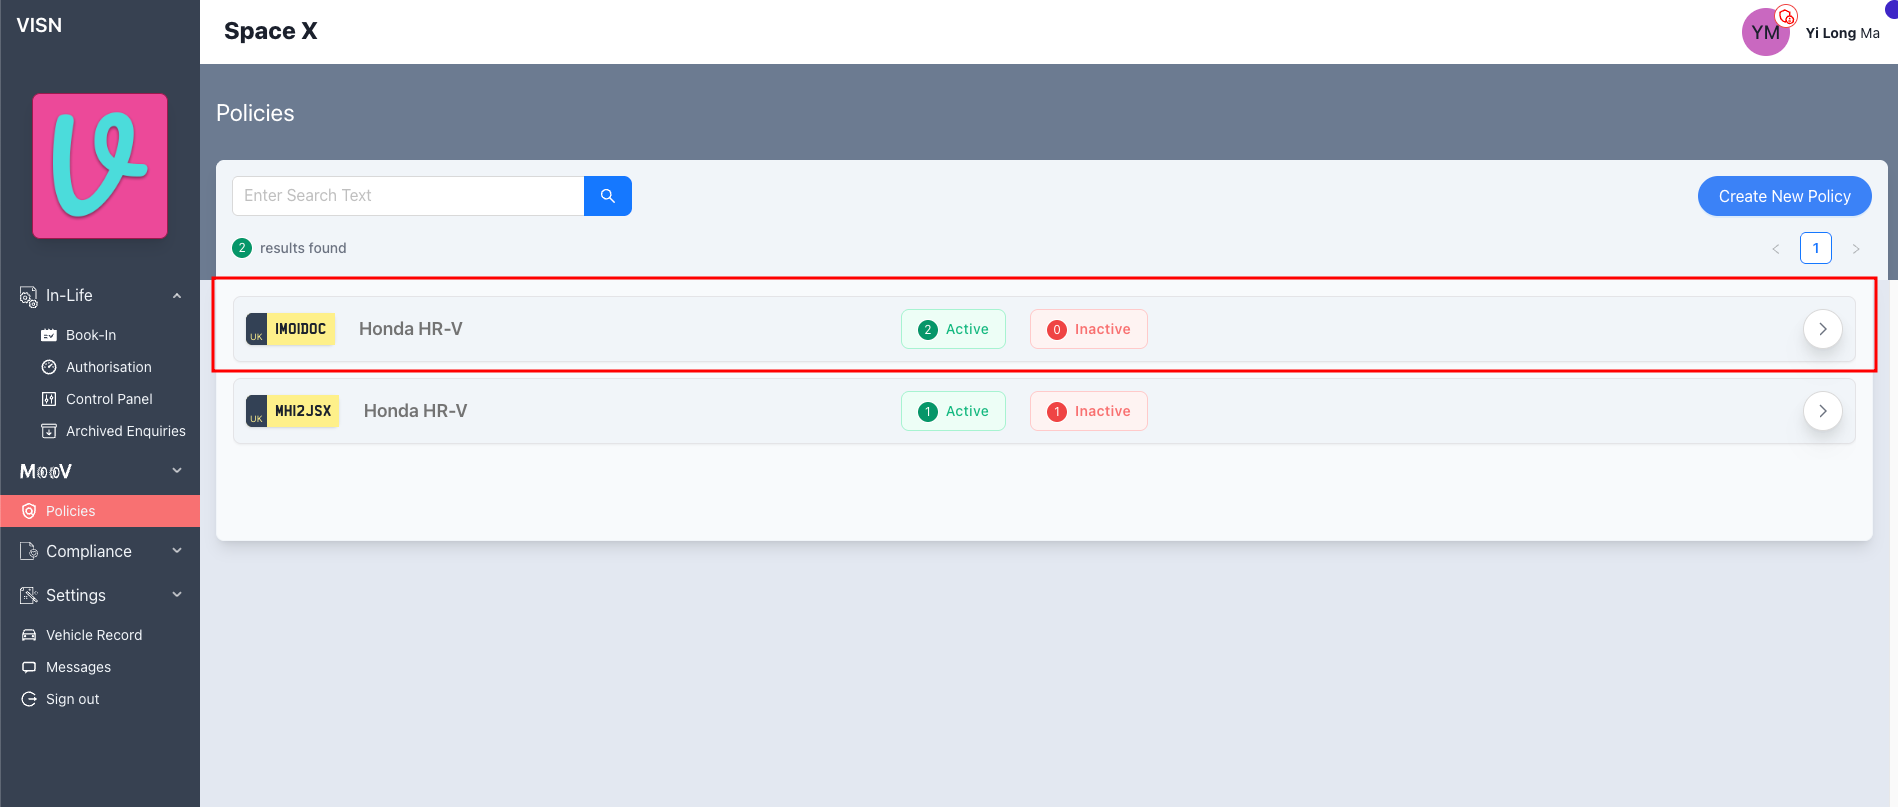
Step 6: Confirm the Imported Vehicle Is Visible
- Search for one of the vehicles included in the import file.
- Confirm that the vehicle is listed on the Policies page.
- If the vehicle is not visible, recheck the import status and logs before continuing.
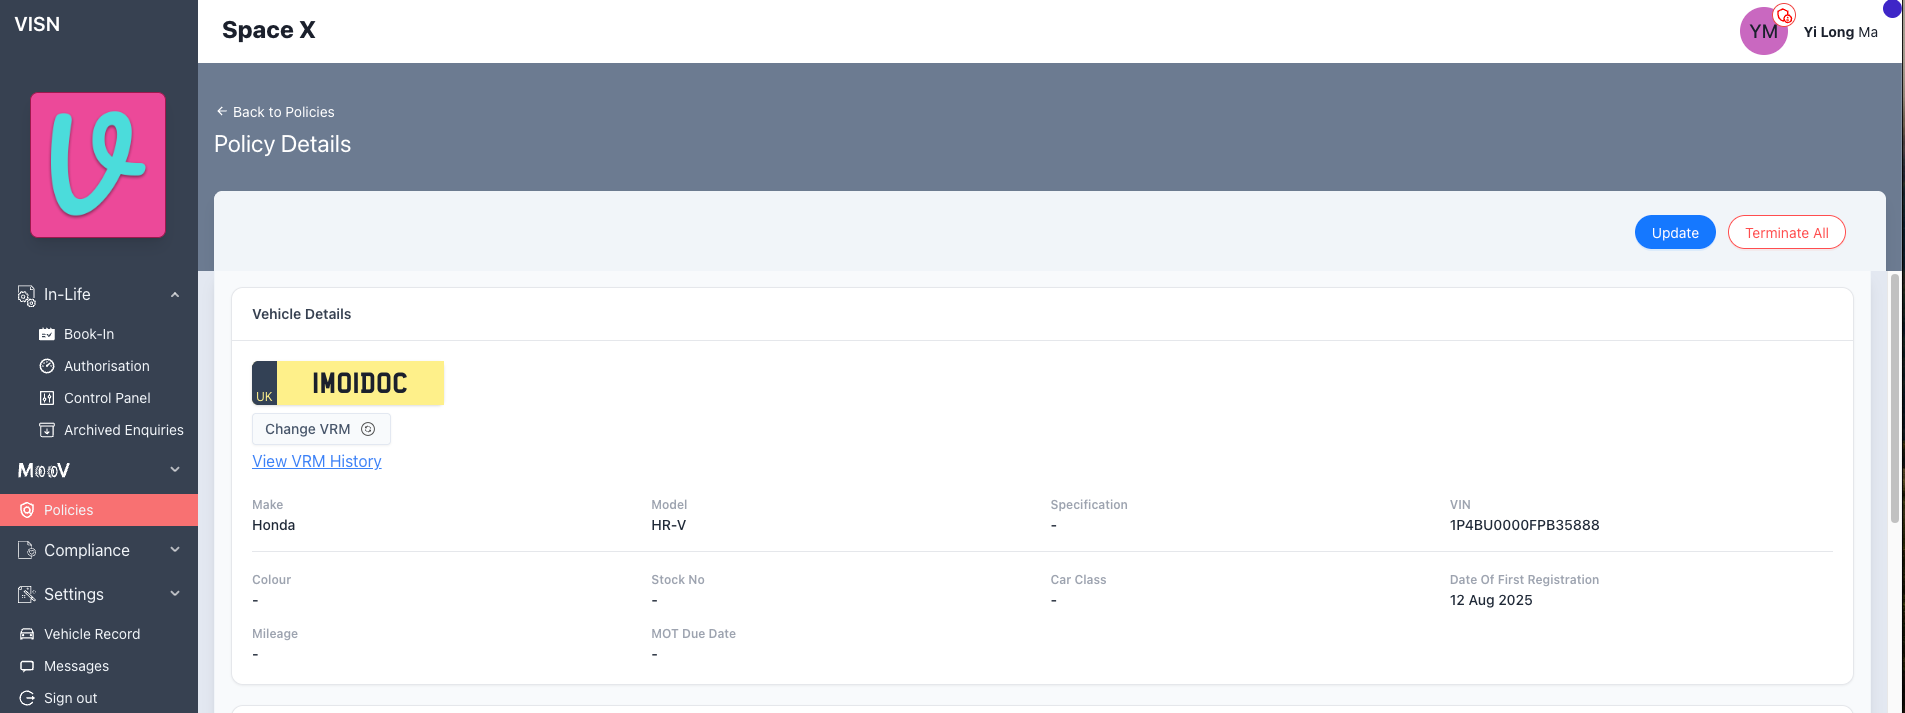
Step 7: Open the Policy Details
- Click
Viewfor the imported vehicle. - Open the policy details page.
- Confirm that the page loads correctly for the selected vehicle.
Step 8: Verify the Imported Policy Data
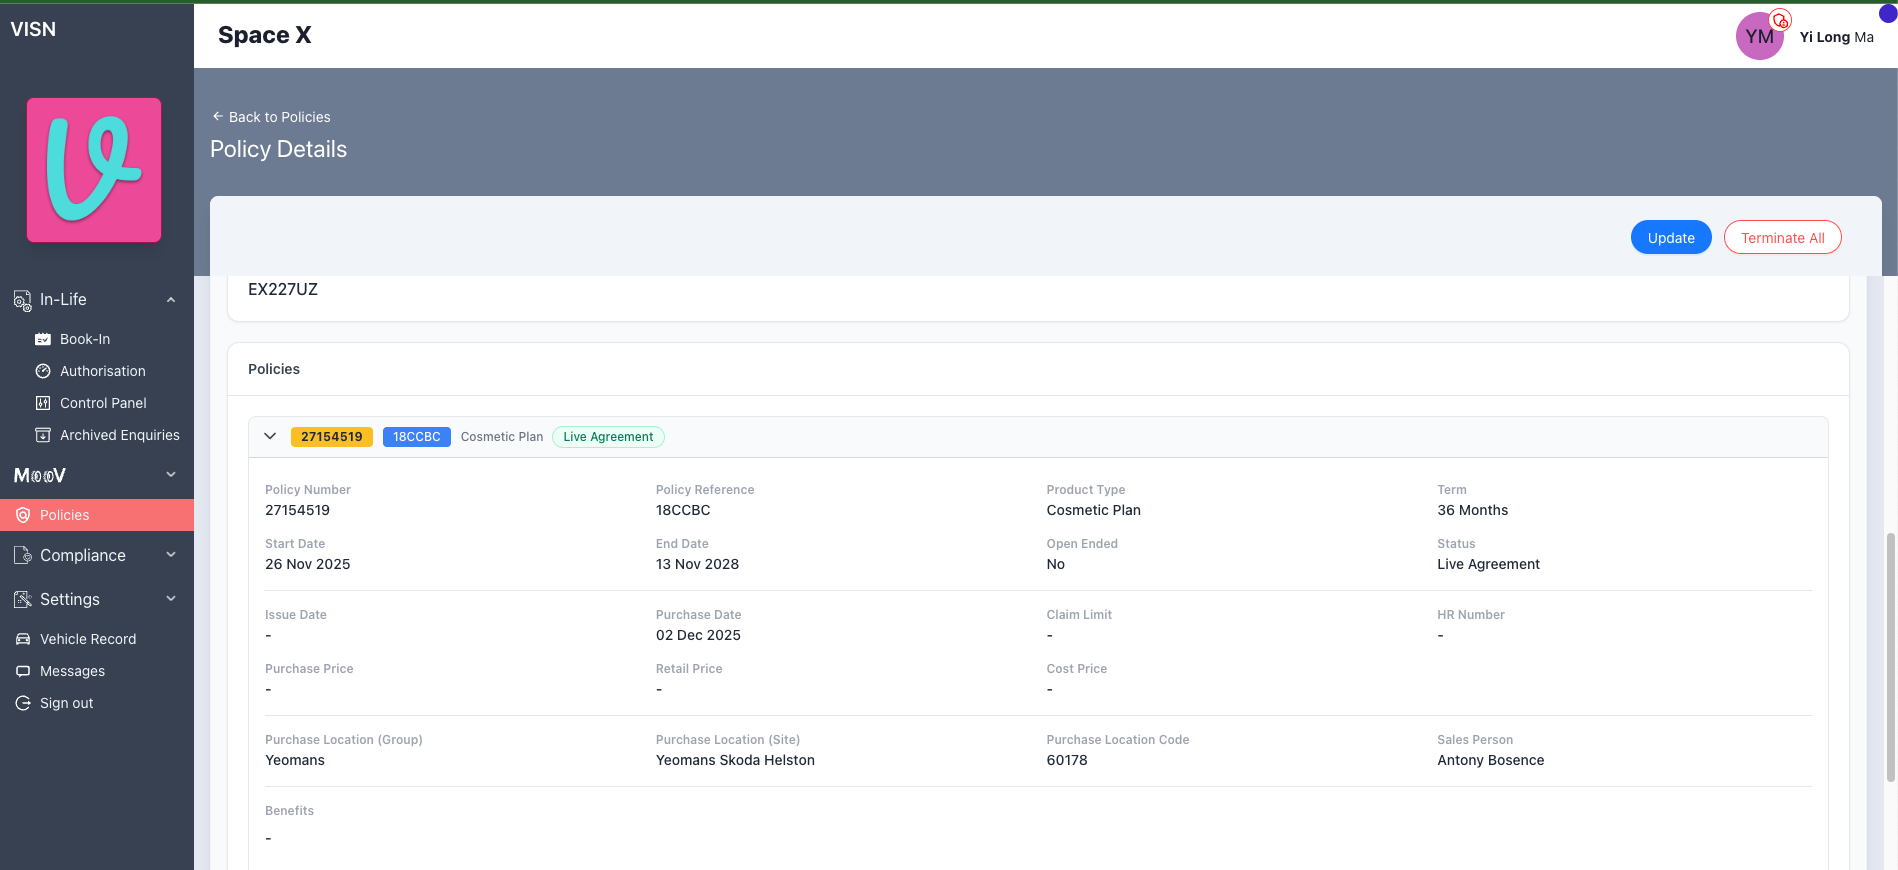
- Confirm that the vehicle details are correct.
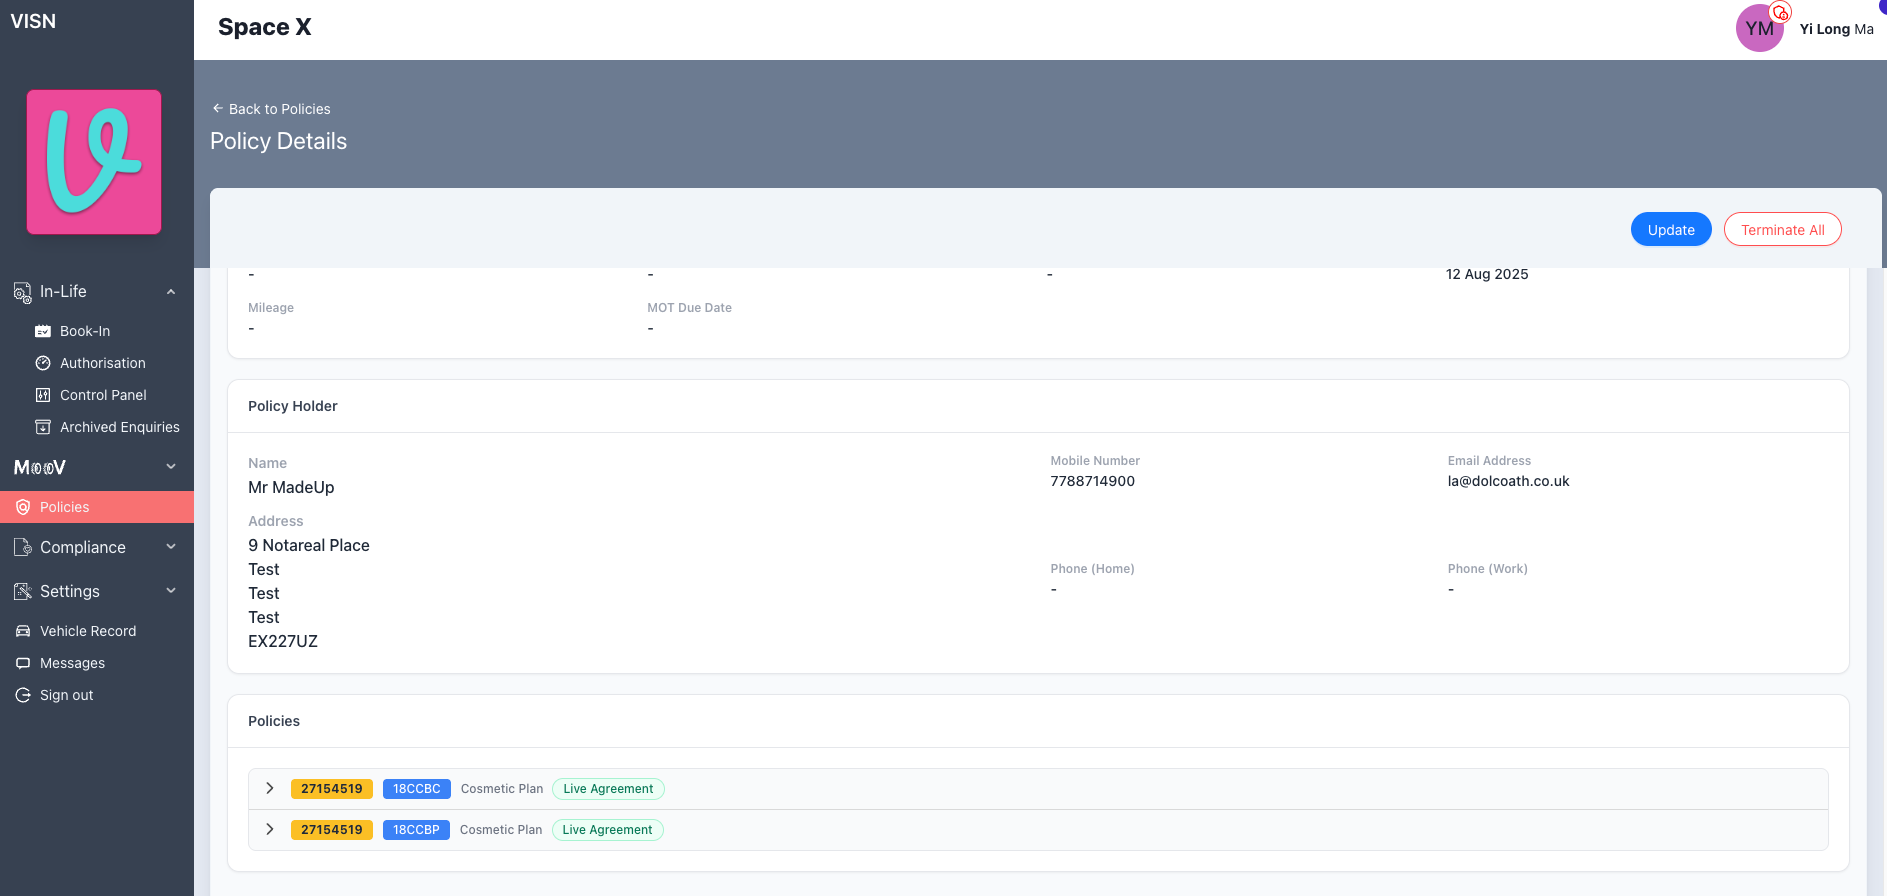
- Confirm that the expected policy records are present.
- If the source file contained multiple policies for the same vehicle, confirm that they appear under the same vehicle record.
- Confirm that the policy holder details are correct where applicable.
- If benefits were included, confirm that the expected benefits are shown against the relevant policy.
Status: Approved
Category: Protected
Authored By: Hadley on Apr 14, 2026